Thursday, 28 April 2011

Adjusting the Rear Brake Light Switch

Hello fellow Nighthawkers!
I noticed that the brake lights weren't coming on when the rear brake pedal was depressed, so for today's project, we'll be adjusting the brake light switch.

This is a simple adjustment to do that will enhance your riding saftey, so you might want to give it a try.

First, remove the seat and right side panel. Since this was already covered in detail in a previous project (Carb Sync) I won't cover it again.

This is what it looks like under the cover.

And this is the brake light switch, lying very close and below the battery.

In order to adjust when the brake light comes on when you step on the brake pedal, you want to move the switch either closer to the pedal, or further from the pedal.

To make it come on earlier, you want to move the switch AWAY from the pedal, so that it will require very little action to pull on the switch and trigger the brake light.

If you want to make it come on later, you move the switch TOWARDS the pedal, so that it will require a greater travel of your rear brake pedal before it pulls on the brake switch, and trigger the brake light to come on.

You adjust the distance by turning the plastic wheel.
But in order to get the wheel to turn, you need to push the switch up and towards the back of the bike, so the plastic knob is not resting on the holder. The holder is indicated by the blue arrow, and the plastic knob you turn is indicated by the red arrow.

To engage the brake light earlier, you turn the knob clockwise when viewing down the switch from the rear of the bike. Vice versa to engage the light later.

Here's a picture of me turning the plastic adjustment knob. I wish they just used regular lock and adjusting nuts for this, would've made our lives easier.
The knob might be really tight if it hasn't been adjusted for a long time. Some silicone lubricating fluid might help. The adjuster on mine was pretty hard to turn, but after some coaxing, it moved. The important trick here is to make sure you push the switch up so it's not resting on the holder. If it is, the knob won't turn.
 
After making a few turns, get an assistant to step on the brake pedal while you watch the brake light. 

The goal is to get the light to come on very slightly before the rear brake engages. 
After a few tries and some minor adjustments, it's now working properly.

It should take you no more than 20 mins to do this from start to finish. Give yours a check and see if it needs adjustment! It'll contribute to keeping us safe on the roads. Use your tools, and happy wrenching.

Till next time.


Thursday, 21 April 2011

Synchronizing the Carburetors (Part 3)

Ok, here's the last part of our series on synchronizing the carbs that you've been waiting for. I apologize for the delay, been busy with work.

First, I'd like to address a couple of things. The manual recommends that you warm up the bike fully before you start to plug in your carb sync tool. I don't think that's a very good idea because everything's going to be hot, and it's hard not to burn yourself trying to remove screws and installing the fittings to sync the carbs.

I mean, life's already hard enough as it is. Why make it harder on yourself?

So I installed all the fittings for the carb sync tool while the bike was cold. Stone cold. No way of getting burned that way.

First I attach my carb sync tool to the right handlebar grip.
Next I hook up the tool's vacuum hose to nozzle #1.
And hook up the other end of the hose to the carb sync tool.
Hose #1 done.
Here's another shot.
Do the same for hose #2 to nozzle #2.
All hoses hooked up and ready to go. As I look at this picture, I realize that I might have done something wrong. The hoses are supposed to go over the grips and behind the sync tool. Not sure if it makes much difference though. Probably not.
At this point, I re-checked all the connections, especially the fuel hose, to make sure everything's tight and firmly fitted. Then I started the bike and let it warm up.

Here's what the initial setting looked like. The vacuum in carb #1 is the lowest, followed by #4. The level is blurry because it's oscillating as I took this picture.

I started by adjusting #1. Remember, #2 is the reference level and it's not adjustable. So adjust all levels to match #2.

Once I got #1 balanced with #2, I proceeded to #3. When you adjust #3, you will affect #1, but just leave it for now. Once #3 is close to #2, I move on to adjust #4 to make it match #2.

Turn the screw in very small increments, then blip the throttle, look at the sync tool and wait five seconds. If that's insufficient, then turn the screw somemore, and repeat.

It takes a little while for the new setting to register on the gauge, and if you keep turning the screw very quickly without waiting, you'll overshoot the correct setting. That's probably the most important thing to remember if you're doing this for the first time.

Once that's done, go back and do them all again, starting from #1. You probably have to do this a few cycles to get it right.

Here's a shot I took while adjusting the carbs.

And here's the final state. Looks pretty balanced.

After that's done, just put things back in the reverse order from how you took them off, and you'll be all done.

What are the advantages of doing this? There are a few that you can feel right away.

The bike is smoother and there are less vibrations, and the bike warms up faster. I believe the fuel consumption also decreases as all four cylinders work equally hard now, more or less.

Seriously, the most challenging part of this whole project is getting the carbs sync'ed up. If you have your own garage and are able to get a fan in front of the bike, use it. Point it at the oil cooler and turn it full blast so the bike doesn't overheat.

I didn't use a fan though. The key is to be patient, take your time, and keep at it till the carbs are properly balanced. Changing the settings on one carb will affect the other carbs, so you'll likely need to go back and do it several times. This is normal and it's nothing to be frustrated over.

If I remember correctly, turning the screw clockwise causes the vacuum (and the level) in a particular manifold to rise. So if the mercury level is low, turn the screw clockwise. If it's too high, turn it counter-clockwise.

Here's another tip. Once you're done sync'ing the carbs, turn the fuel tap off and let the bike run till it dies. This will clear up all the fuel in the long hose, and you'll have less cleanup to do. Remember to turn the tap on after you hook everything back up.

I've heard that experienced folks can do this whole operation with just the fuel in the float bowls. Which means they don't have to go through the whole process of fixing up an auxillary fuel tank. If you can do it, please send me a video. So far, I have never seen even a professional mechanic who does it that way, so I'll believe it when I see it. :)

Well, have a good Good Friday, use your tools, and happy wrenching! Will talk to you soon.

Sunday, 17 April 2011

Synchronizing the Carburetors (Part 2)

Here's my plan. I didn't want to buy an auxillary fuel tank, so I thought I'd just use the fuel tank to supply fuel while I balanced the carbs. However, if you can get your hands on an auxillary tank for an affordable price, I'd suggest you get it. It'll save you a lot of hassle and time.

Special "tools" needed for this project (you either need tool set A or B, not both):

TOOL SET A
1) Extra fuel hose. Get about half a meter. The internal diameter of the hose should be around 8mm.
2) Hose joiner
3) Carb sync tool

TOOL SET B
1) Auxillary fuel tank
2) Carb sync tool

In order to use the bike's tank, I have to swap out the fuel hose. Now on hindsight, I could have just gotten a hose connector or hose joiner to save me some time and trouble. But since I didn't have one, I pulled out the fuel hose. It has a spring clip attaching it at the carb end, so use a long pair of needle nose pliers to squeeze the clip while you pull the hose out.
This is what the fuel hose attaches to.
Here's a view of the spring clip holding the fuel hose in place. You don't have to remove the clip, you just have to press it in to release the spring pressure, then you can pull the hose out. You can squeeze it with your fingers if your hands are small enough (unlikely) or use a looooong pair of needle nose pliers.
It's important to know that you don't need to remove the fuel hose from the carbs if you:

1) Have an auxillary fuel tank
2) Buy a hose joiner

By hose joiner, I mean something like this:
With a hose joiner, you just plug in the hose joiner into the bike's fuel hose, then plug the extra hose you bought on the other end.

Or if you want to go the way of an auxillary fuel tank, here's what one looks like:
With the auxillary tank you need to hang it somewhere, but it needs to be higher than the carbs because it's gravity fed. Perhaps you can even use the handlebars.

You can see that there's a hose joiner and a petcock at the end of the tubing, so if you get the auxillary tank you don't have to buy that separately.

But if you're a tightwad like me, then buy extra hose and a hose joiner.

Next, we need to remove the vacuum line from the intake manifold, because this is where the hose from the carb sync tool is going to plug into.

On the Nighthawk 750, the vacuum hose plugs into the intake manifold of cylinder #2. That's the second cylinder from the left when you're sitting on the bike. This will be the reference cylinder.
Here's another view from a different angle. You'll recall that the free end of that hose plugs into the vacuum inlet of your fuel tank petcock.
After you pull that hose off, this is what you should see.
The nozzle circled in red is where the vacuum line plugs into. It's attached to the manifold that feeds carb #2. Do not remove this nozzle, because we're going to plug the carb sync tool's hose into this.

We're going to have to remove the screw circled in blue. That's on the manifold that feeds carb #1. Remove it with a #2 Phillips screwdriver.
Here's another view of that screw being backed out.
Make sure you get both the screw and washer off the manifold. Sometimes, the washer will tend to stick to the manifold and it can't be easily seen. If the washer didn't come off with the screw, stick a pick or a small screwdriver into the centre of the washer to prevent it falling somewhere you'll regret, then carefully pry it off.

By the way, the washer is non-ferrous (I think). I tried to pick it up with my extendable magnet, but it didn't work.

Now, you're going to screw a nozzle into the hole that came with your carb sync tool. On mine, the nozzle is made of plastic, and it has an O-ring on it. This is what it looks like.
Screw the plastic nozzle into the hole.

So now, manifold #1 is done. Manifold #2 doesn't require us to do anything, so now we move on to manifold #3. This is the most tricky one to reach because of its position, so a really long screwdriver will help. The big orangy tube on the right is the crankcase breather tube, and this shot is facing the front of the bike.
The last screw is easy-peasy.
Next I screw in the plastic nozzle supplied with the carb sync tool into the hole on manifold #3. Here's the hole again.
With nozzle screwed in.
Do the same for the screw for carb #4.

Now before you hook up the carb sync tool hoses, have a look around to identify the screws you'll be using to sync the carbs.

This first one controls carb #1. To easily identify the screw, it's the one that's in front of the bar that holds all the carbs together. As you can see in the picture, it's between carb #1 and carb #2.

This picture shows the other two screws. The blue screw controls carb #3 and the red one controls carb #4.

It's important that you identify these screws first before you start the bike up, because the bike is air-cooled and you don't want to spend any more time then necessary syncing the carbs. You definitely don't want to be searching for the screws when the engine is running.

Ok, now I'm going to hook up the fuel tank for my fuel supply. First, here's the extra fuel hose that I bought.
Insert that into the fuel nozzle on the carbs. There's a picture of the fuel nozzle above, scroll up if you've forgotten what it looks like.
Next my lovely assistant lays the fuel tank down near the rear of the bike. Be careful of where the fuel petcock is resting. Try to protect it with a cloth or a sponge or something soft.
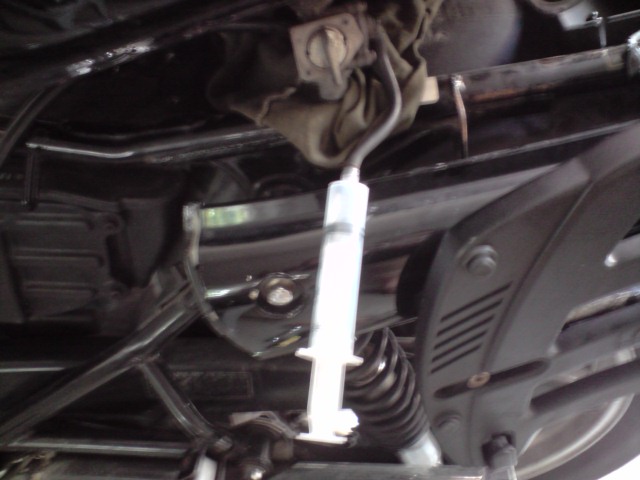
What in the world is that syringe doing there, you ask? There's a simple explanation, my good sir (or madam).

Remember Part 1 of this series, where we talked a little about how the diaphragm valve operates? Well, if you just turn on the petcock and connect the fuel line to the carbs, the fuel isn't going to flow, because there's no vacuum to pull that valve open.

Thanks to the kind folks over on Advrider, I'm told a syringe will solve this problem.

So you stick any syringe that will fit onto the vacuum line.
Next, just pull the plunger back to supply a vacuum. You need to have a way to keep the plunger pulled back though, because when you're not looking and when your back is turned, that naughty plunger will very slowly work itself back into the syringe again. Spanking it didn't work, so try tying some rope around it, or use one of those big document clips to keep it open.
This is how the set up looks like.
Ok, I think I'll stop here for tonight. Hope you enjoyed this walkthrough, and we'll continue this series in Part 3. Watch out for it!

Use your tools, and happy wrenching!

Saturday, 16 April 2011

Synchronizing the Carburetors (Part 1)

Hello!
For our next project, we're going to be synchronizing the carbs. If you haven't already, please follow our blog so that you can get updates on new posts.

Please feel free to drop a comment or two and share your thoughts and expertise with me and our readers.

This bike is pretty smooth when I bought it, at low RPMs at least. But once you start to crank it up, I can feel vibrations coming on through the grips on the handlebars. So this was a job that I've really been wanting to do for some time. Well, enough talking, let's jump right in.

First, remove the seat. I assume everyone knows how to do that, but in case you don't, insert your key and unlock the seat lock.
 Next remove the seat. Just slide it back and up, and it should come off.
The next thing to come off are the side panels. There are no screws holding them on. These panels have protrusions on them that plug into rubber grommets on the frame of the bike, so you just pull them off. 

However, make sure you pull them off in the correct order or you might risk breaking the hinged tabs. I'll tell you what I mean as we go along.

Grip the panel as shown in the picture, then push with your thumbs and pull with your fingers. It should release the top of the panel.
Next grab the bottom like this, and pull gently.
 That should release the front of the panel. 

The back of the panel has a hinge, and it hooks onto the rear cowl. You need to be gentle with the panel because the hinge is fragile and it's not difficult to break it. So the rear of the panel comes off last.
Here's another view of the hinged catch.
Do the same for the other side.
Here you can see the protrusion of the panel which goes into the rubber grommet.
 A close-up view.
Here's a close up view of the hinged catch again.
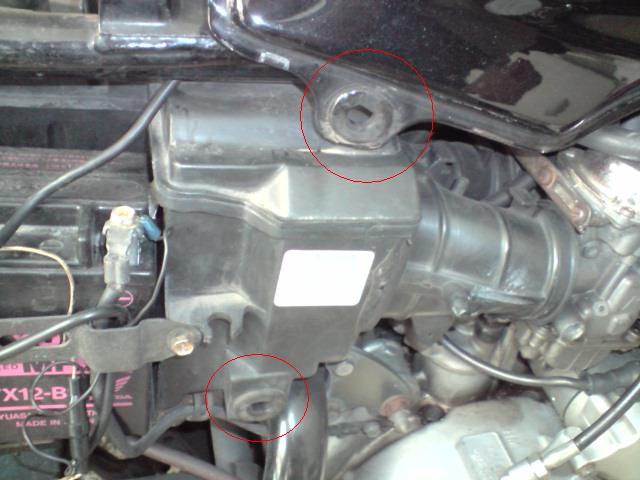
The grommets where the protrusions plug into are circled in red here.
And a close-up shot of the protrusions behind the side panel.
Next we need to remove the fuel tank. The first thing to remove is the bolt holding down the rear of the tank. It's as 12mm bolt on my bike.
Wrench or ratchet, your choice. I chose wrench this time. Remember, righty-tighty, lefty-loosey. So that's anticlockwise to remove, clockwise to tighten.
This is where that bolt screws into.
Next remove the vacuum hose from the petcock. The circled part is where the vacuum hose fits onto.
The fuel tank on this bike is a gravity-fed tank, meaning the tank feeds fuel to the carbs by gravity. There is no fuel pump on this bike.

However the bike has a safety feature in case the bike is overturned in a drop or an accident. If the engine is cut-off using the cut-off switch on the handlebar, the fuel will stop flowing.

Why? Because there is a valve in the petcock that stops fuel from flowing out when the engine is not running. It's called a diaphragm valve I believe. When you start the bike and the starter motor starts cranking the engine over, the motion of the pistons moving downwards and the exhaust valves closed and intake valves open, creates a huge sucking force, or vacuum.

This vacuum goes through a vacuum tube into the fuel petcock, sucking the diaphragm valve open, allowing the flow of fuel into the carbs.

With the vacuum tube removed, it's time to prop the tank up. Here's a useful tip, especially if you're doing this alone. It is very challenging to try to prop up the tank and remove the fuel hose at the same time. So it helps if you can prop the back of the tank up with an object (I used my trusty rubber mallet) so that you have enough room to remove the fuel hose. Just shake the tank around and make sure it's stable.
Next turn off the fuel tap. If the diaphragm valve is working it shouldn't matter, but just in case it's not working, turn it off.

I'll have to admit that I always forget to turn the petcock back on when I go to ride the bike after taking the tank off, so remember to turn it back on again after you're done.
The fuel hose comes out from behind the petcock and it isn't normally visible or accessible when the fuel tank is sitting on the bike. That's supposed to be a good thing I suppose. It will prevent some low life from unplugging your fuel hose and trying to steal your gas. Yes, I've heard of that happening, what more with the rising fuel prices nowadays.

Here's a view of how the fuel hose attaches to the petcock viewing from the back of the bike. The red arrow points to the fuel hose. The blue arrow points to the attachment point for the vacuum hose that you just removed.
Here's a far out shot so you can get the context of where the fuel hose goes on. You can't really see it very clearly in this shot, so I've circled the petcock for you. Notice how the fuel hose runs towards the centre of the bike.
The hose will be tight, but you should be able to grip the hose clamp with your fingers to open it, and then pull out the fuel hose.
Once that's done, all you have to do is to lift up the back of the fuel tank, and pull it back and up, towards the back of the bike. Before you remove the tank, lay down some cloth on where you're going to lay the tank down, to prevent scratching it or the bottom of the petcock. Did I mention laying it down really slowly and gently?

The front of the tank rests on these rubber grommets.
And with that, we'll conclude part one of our series on synchronizing the carbs.

Please follow this blog so that you'll get notification of updates.

If you have ideas or advice on how I can do this better, please comment on the blog!

Thanks for reading, use your tools, and happy wrenching! Oh, and stay tuned for Part 2. :)