Special "tools" needed for this project (you either need tool set A or B, not both):
TOOL SET A
1) Extra fuel hose. Get about half a meter. The internal diameter of the hose should be around 8mm.
2) Hose joiner
3) Carb sync tool
TOOL SET B
1) Auxillary fuel tank
2) Carb sync tool
In order to use the bike's tank, I have to swap out the fuel hose. Now on hindsight, I could have just gotten a hose connector or hose joiner to save me some time and trouble. But since I didn't have one, I pulled out the fuel hose. It has a spring clip attaching it at the carb end, so use a long pair of needle nose pliers to squeeze the clip while you pull the hose out.


1) Have an auxillary fuel tank
2) Buy a hose joiner
By hose joiner, I mean something like this:

Or if you want to go the way of an auxillary fuel tank, here's what one looks like:

You can see that there's a hose joiner and a petcock at the end of the tubing, so if you get the auxillary tank you don't have to buy that separately.
But if you're a tightwad like me, then buy extra hose and a hose joiner.
Next, we need to remove the vacuum line from the intake manifold, because this is where the hose from the carb sync tool is going to plug into.
On the Nighthawk 750, the vacuum hose plugs into the intake manifold of cylinder #2. That's the second cylinder from the left when you're sitting on the bike. This will be the reference cylinder.


We're going to have to remove the screw circled in blue. That's on the manifold that feeds carb #1. Remove it with a #2 Phillips screwdriver.


By the way, the washer is non-ferrous (I think). I tried to pick it up with my extendable magnet, but it didn't work.

Now, you're going to screw a nozzle into the hole that came with your carb sync tool. On mine, the nozzle is made of plastic, and it has an O-ring on it. This is what it looks like.


So now, manifold #1 is done. Manifold #2 doesn't require us to do anything, so now we move on to manifold #3. This is the most tricky one to reach because of its position, so a really long screwdriver will help. The big orangy tube on the right is the crankcase breather tube, and this shot is facing the front of the bike.


Now before you hook up the carb sync tool hoses, have a look around to identify the screws you'll be using to sync the carbs.
This first one controls carb #1. To easily identify the screw, it's the one that's in front of the bar that holds all the carbs together. As you can see in the picture, it's between carb #1 and carb #2.

This picture shows the other two screws. The blue screw controls carb #3 and the red one controls carb #4.

It's important that you identify these screws first before you start the bike up, because the bike is air-cooled and you don't want to spend any more time then necessary syncing the carbs. You definitely don't want to be searching for the screws when the engine is running.
Ok, now I'm going to hook up the fuel tank for my fuel supply. First, here's the extra fuel hose that I bought.


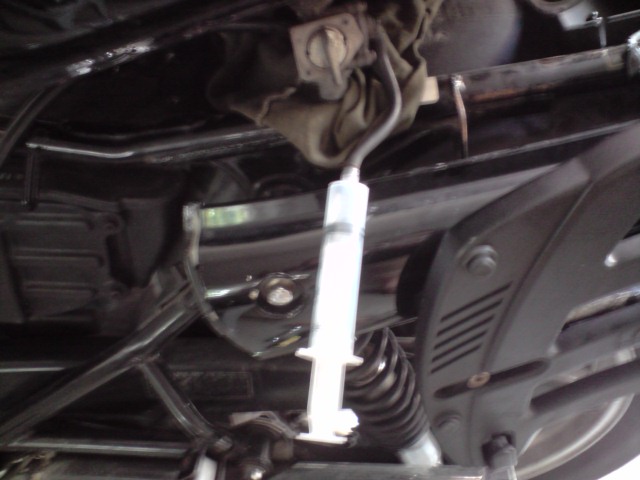
Remember Part 1 of this series, where we talked a little about how the diaphragm valve operates? Well, if you just turn on the petcock and connect the fuel line to the carbs, the fuel isn't going to flow, because there's no vacuum to pull that valve open.
Thanks to the kind folks over on Advrider, I'm told a syringe will solve this problem.
So you stick any syringe that will fit onto the vacuum line.


Use your tools, and happy wrenching!
No comments:
Post a Comment