Thursday 21 April 2011

Synchronizing the Carburetors (Part 3)

Ok, here's the last part of our series on synchronizing the carbs that you've been waiting for. I apologize for the delay, been busy with work.

First, I'd like to address a couple of things. The manual recommends that you warm up the bike fully before you start to plug in your carb sync tool. I don't think that's a very good idea because everything's going to be hot, and it's hard not to burn yourself trying to remove screws and installing the fittings to sync the carbs.

I mean, life's already hard enough as it is. Why make it harder on yourself?

So I installed all the fittings for the carb sync tool while the bike was cold. Stone cold. No way of getting burned that way.

First I attach my carb sync tool to the right handlebar grip.
Next I hook up the tool's vacuum hose to nozzle #1.
And hook up the other end of the hose to the carb sync tool.
Hose #1 done.
Here's another shot.
Do the same for hose #2 to nozzle #2.
All hoses hooked up and ready to go. As I look at this picture, I realize that I might have done something wrong. The hoses are supposed to go over the grips and behind the sync tool. Not sure if it makes much difference though. Probably not.
At this point, I re-checked all the connections, especially the fuel hose, to make sure everything's tight and firmly fitted. Then I started the bike and let it warm up.

Here's what the initial setting looked like. The vacuum in carb #1 is the lowest, followed by #4. The level is blurry because it's oscillating as I took this picture.

I started by adjusting #1. Remember, #2 is the reference level and it's not adjustable. So adjust all levels to match #2.

Once I got #1 balanced with #2, I proceeded to #3. When you adjust #3, you will affect #1, but just leave it for now. Once #3 is close to #2, I move on to adjust #4 to make it match #2.

Turn the screw in very small increments, then blip the throttle, look at the sync tool and wait five seconds. If that's insufficient, then turn the screw somemore, and repeat.

It takes a little while for the new setting to register on the gauge, and if you keep turning the screw very quickly without waiting, you'll overshoot the correct setting. That's probably the most important thing to remember if you're doing this for the first time.

Once that's done, go back and do them all again, starting from #1. You probably have to do this a few cycles to get it right.

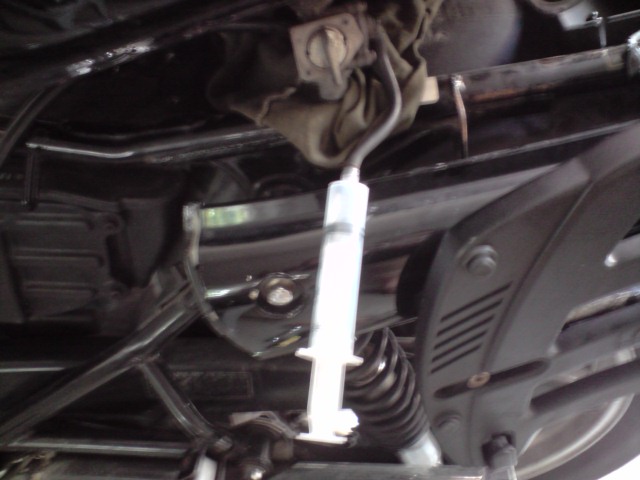
Here's a shot I took while adjusting the carbs.

And here's the final state. Looks pretty balanced.

After that's done, just put things back in the reverse order from how you took them off, and you'll be all done.

What are the advantages of doing this? There are a few that you can feel right away.

The bike is smoother and there are less vibrations, and the bike warms up faster. I believe the fuel consumption also decreases as all four cylinders work equally hard now, more or less.

Seriously, the most challenging part of this whole project is getting the carbs sync'ed up. If you have your own garage and are able to get a fan in front of the bike, use it. Point it at the oil cooler and turn it full blast so the bike doesn't overheat.

I didn't use a fan though. The key is to be patient, take your time, and keep at it till the carbs are properly balanced. Changing the settings on one carb will affect the other carbs, so you'll likely need to go back and do it several times. This is normal and it's nothing to be frustrated over.

If I remember correctly, turning the screw clockwise causes the vacuum (and the level) in a particular manifold to rise. So if the mercury level is low, turn the screw clockwise. If it's too high, turn it counter-clockwise.

Here's another tip. Once you're done sync'ing the carbs, turn the fuel tap off and let the bike run till it dies. This will clear up all the fuel in the long hose, and you'll have less cleanup to do. Remember to turn the tap on after you hook everything back up.

I've heard that experienced folks can do this whole operation with just the fuel in the float bowls. Which means they don't have to go through the whole process of fixing up an auxillary fuel tank. If you can do it, please send me a video. So far, I have never seen even a professional mechanic who does it that way, so I'll believe it when I see it. :)

Well, have a good Good Friday, use your tools, and happy wrenching! Will talk to you soon.

Sunday 17 April 2011

Synchronizing the Carburetors (Part 2)

Here's my plan. I didn't want to buy an auxillary fuel tank, so I thought I'd just use the fuel tank to supply fuel while I balanced the carbs. However, if you can get your hands on an auxillary tank for an affordable price, I'd suggest you get it. It'll save you a lot of hassle and time.

Special "tools" needed for this project (you either need tool set A or B, not both):

TOOL SET A
1) Extra fuel hose. Get about half a meter. The internal diameter of the hose should be around 8mm.
2) Hose joiner
3) Carb sync tool

TOOL SET B
1) Auxillary fuel tank
2) Carb sync tool

In order to use the bike's tank, I have to swap out the fuel hose. Now on hindsight, I could have just gotten a hose connector or hose joiner to save me some time and trouble. But since I didn't have one, I pulled out the fuel hose. It has a spring clip attaching it at the carb end, so use a long pair of needle nose pliers to squeeze the clip while you pull the hose out.
This is what the fuel hose attaches to.
Here's a view of the spring clip holding the fuel hose in place. You don't have to remove the clip, you just have to press it in to release the spring pressure, then you can pull the hose out. You can squeeze it with your fingers if your hands are small enough (unlikely) or use a looooong pair of needle nose pliers.
It's important to know that you don't need to remove the fuel hose from the carbs if you:

1) Have an auxillary fuel tank
2) Buy a hose joiner

By hose joiner, I mean something like this:
With a hose joiner, you just plug in the hose joiner into the bike's fuel hose, then plug the extra hose you bought on the other end.

Or if you want to go the way of an auxillary fuel tank, here's what one looks like:
With the auxillary tank you need to hang it somewhere, but it needs to be higher than the carbs because it's gravity fed. Perhaps you can even use the handlebars.

You can see that there's a hose joiner and a petcock at the end of the tubing, so if you get the auxillary tank you don't have to buy that separately.

But if you're a tightwad like me, then buy extra hose and a hose joiner.

Next, we need to remove the vacuum line from the intake manifold, because this is where the hose from the carb sync tool is going to plug into.

On the Nighthawk 750, the vacuum hose plugs into the intake manifold of cylinder #2. That's the second cylinder from the left when you're sitting on the bike. This will be the reference cylinder.
Here's another view from a different angle. You'll recall that the free end of that hose plugs into the vacuum inlet of your fuel tank petcock.
After you pull that hose off, this is what you should see.
The nozzle circled in red is where the vacuum line plugs into. It's attached to the manifold that feeds carb #2. Do not remove this nozzle, because we're going to plug the carb sync tool's hose into this.

We're going to have to remove the screw circled in blue. That's on the manifold that feeds carb #1. Remove it with a #2 Phillips screwdriver.
Here's another view of that screw being backed out.
Make sure you get both the screw and washer off the manifold. Sometimes, the washer will tend to stick to the manifold and it can't be easily seen. If the washer didn't come off with the screw, stick a pick or a small screwdriver into the centre of the washer to prevent it falling somewhere you'll regret, then carefully pry it off.

By the way, the washer is non-ferrous (I think). I tried to pick it up with my extendable magnet, but it didn't work.

Now, you're going to screw a nozzle into the hole that came with your carb sync tool. On mine, the nozzle is made of plastic, and it has an O-ring on it. This is what it looks like.
Screw the plastic nozzle into the hole.

So now, manifold #1 is done. Manifold #2 doesn't require us to do anything, so now we move on to manifold #3. This is the most tricky one to reach because of its position, so a really long screwdriver will help. The big orangy tube on the right is the crankcase breather tube, and this shot is facing the front of the bike.
The last screw is easy-peasy.
Next I screw in the plastic nozzle supplied with the carb sync tool into the hole on manifold #3. Here's the hole again.
With nozzle screwed in.
Do the same for the screw for carb #4.

Now before you hook up the carb sync tool hoses, have a look around to identify the screws you'll be using to sync the carbs.

This first one controls carb #1. To easily identify the screw, it's the one that's in front of the bar that holds all the carbs together. As you can see in the picture, it's between carb #1 and carb #2.

This picture shows the other two screws. The blue screw controls carb #3 and the red one controls carb #4.

It's important that you identify these screws first before you start the bike up, because the bike is air-cooled and you don't want to spend any more time then necessary syncing the carbs. You definitely don't want to be searching for the screws when the engine is running.

Ok, now I'm going to hook up the fuel tank for my fuel supply. First, here's the extra fuel hose that I bought.
Insert that into the fuel nozzle on the carbs. There's a picture of the fuel nozzle above, scroll up if you've forgotten what it looks like.
Next my lovely assistant lays the fuel tank down near the rear of the bike. Be careful of where the fuel petcock is resting. Try to protect it with a cloth or a sponge or something soft.
What in the world is that syringe doing there, you ask? There's a simple explanation, my good sir (or madam).

Remember Part 1 of this series, where we talked a little about how the diaphragm valve operates? Well, if you just turn on the petcock and connect the fuel line to the carbs, the fuel isn't going to flow, because there's no vacuum to pull that valve open.

Thanks to the kind folks over on Advrider, I'm told a syringe will solve this problem.

So you stick any syringe that will fit onto the vacuum line.
Next, just pull the plunger back to supply a vacuum. You need to have a way to keep the plunger pulled back though, because when you're not looking and when your back is turned, that naughty plunger will very slowly work itself back into the syringe again. Spanking it didn't work, so try tying some rope around it, or use one of those big document clips to keep it open.
This is how the set up looks like.
Ok, I think I'll stop here for tonight. Hope you enjoyed this walkthrough, and we'll continue this series in Part 3. Watch out for it!

Use your tools, and happy wrenching!