Hello!
Today we're going to do something exciting. We're going to find out the true condition of the engine, and we do that by performing a compression test.
The engine is nothing but a glorified air pump. In order for you to get maximum power to the wheels, your engine needs to have an airtight seal. That means that no gases are leaking past the valves (both intake and exhaust) and no gases are escaping past the piston rings.
In order for us to test how well the engine is sealing, we need the help of a tool. We need a compression tester.
Here's what it looks like.
The attachment hoses on the left have different sized plugs that allow you to do this test on different types of engines. The one that came with this kit comes with attachements for 10mm, 12mm and 14mm holes. The hole on the Nighthawk is 12mm.
I think most cars use either 14mm or 18mm.
On to our test. In order to properly perform this test, you need to warm up the bike really well. This is because the pistons need to be heated up to their proper operating temperature before they'll seal the cylinders well. From what I read, pistons are actually more oval in shape when their cold, and they only become fully round when they reach their proper temperature.
So to avoid false readings, warm up the engine really well. I had to do this test a second time because I didn't warm it up properly the first time, and so doubted my readings.
First you need to remove the seat, the fuel tank and the side panels. As I've already gone through this in detail in previous posts (Carb Sync), I won't be going through these steps again.
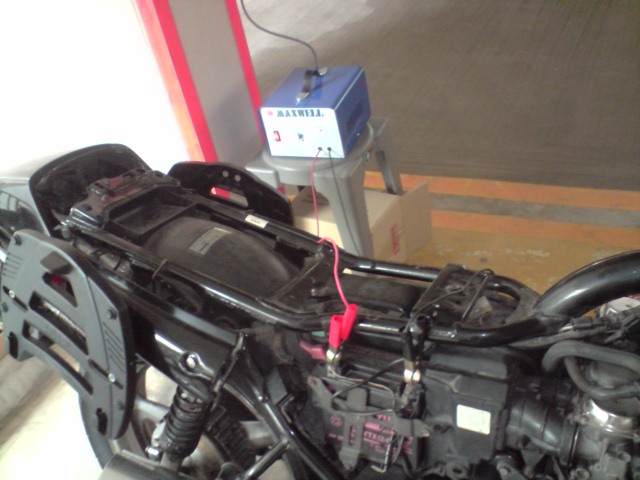
Next you need to hook up a battery charger to the bike's battery. You'll be using a lot of battery juice for this test as you'll be cranking the engine over repeatedly, so the charger prevents the battery from getting drained.
When hooking up a charger, always turn the mains off first. Hook up the red clip to the positive post of the battery first, then hook up the black clip to the negative post. Preferably you should hook the black clip not on the battery post itself, but on the engine or a bare part of the frame (ground). This is the safest way because if there's a spark for any reason, it happens away from the battery. But I did it the easy way because the cable wasn't long enough.
Before you remove the plugs, take some masking tape or sticky tape and label the plug wires with the numbers #1, #2, #3 and #4 so you know which plug wire goes to which plug. The leftmost cylinder is #1.
I took this opportunity to check that the order of the plug wires were ordered correctly. The Clymer manual has the order wrong, so take note of that. The Honda manual gives the correct ordering. This is the correct order:
#1 goes to the Right Bottom coil
#2 goes to the Top Left coil
#3 goes to the Bottom Left coil
#4 goes to the Top Right coil
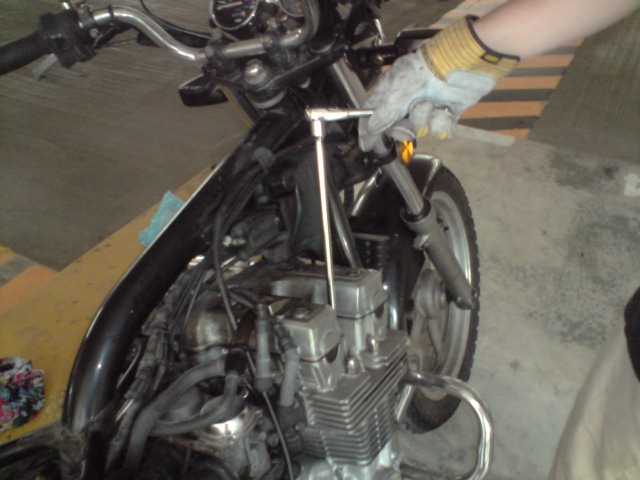
The plugs and cam cover will be hot so make sure you wear work gloves. I used these gardening gloves, which are cheap and work very well to insulate against heat.
When removing the plug wires, do not pull on the wires themselves. Grab the plug cap and give it a smart tug upwards.
Once the caps are off you'll see the spark plug sitting in the engine head.
Next you'll need to remove all the spark plugs. Before you do that, you have to blow out all the dirt around the spark plug holes. There will be a lot of dirt and crud and sometimes even small pebbles lodged in there, because the area is so recessed, so make sure you do this thoroughly. If any dirt falls into the engine, it'll damage the engine.
If you have an air compressor, that'll be the best tool for the job. I didn't so I just used a long straw to blow around the area. Wear a face mask or at least close your eyes when you do this, because stuff will get blown into your face.
You'll need an 18mm long socket and a long extension to remove the plugs.
Crack open the plugs half a turn, then stop. Pick up the straw and start blowing around the plugs again. Make sure it's totally clean before proceeding.
Remove all the plugs. We want to reduce the amount of resistance that the engine will face when we crank the starter. This will allow us to get to our reading faster and drain the battery less.
All four plugs out.
I'm not sure when these plugs were last changed, but the electrodes looked ok. The carb mixture setting looks to be ok too, from the look of the plugs. If you're going to reuse the plugs, try to keep them in the order in which you removed them, so that you can put them back in their original cylinders. These are going into the trash though. I bought new ones.
Ok, we'll stop here for Part One. I'll update the rest when I get more time. I have more exciting stuff coming up, including an ignition timing test that didn't go as planned, a stainless brake hose swap, brake caliper rebuild and swapping out the rear shocks.
Please follow this blog to be informed of new updates, use your tools and happy wrenching!


Hi,
ReplyDeletein one of the pictures I see what it looks like a give mounting rack. Is that true? if so, where did you get it? I recently got a full set of givi cases but I can't find a rack to mount them on my 96 NH 750.
Nice blog, BTW.
Javier.
Hi Javier,
ReplyDeleteThe boxes and mounting hardware came when I bought the bike. The boxes and the backing plate are Givi, but the mounting hardware is not.
One of the previous owners had welded a bracket to the grab rails, and then used some steel plates and bolts/nuts to fasten the backing plate.
Hope this helps, and glad you like the blog.
the straw trick is ingenious!
ReplyDeleteThank you!
DeleteI have a few questions. I have a 2000 nighthawk 750 and wanted want to know where all the mixture screw are on the carb. if possible could you email me some info SethMeyster@gmail.com ? I'd really appreciate it! Thank you!
ReplyDelete