
The hardware is simple. There's the timing light itself, and then there's the positive and negative cables that you hook up to the battery to provide power. The last wire with the red box-like thing is the induction clamp. More on that later.
A close shot of the light itself. It's a cheap one I got from HarborFreight.

Hooking it up was simple. Just connect the red clamp to the positive post of the battery, and the black clamp to the negative post.

After that, hook up the inductive clamp to the spark plug wire going to the #1 cylinder's plug. The #1 cylinder is the leftmost cylinder on the Nighthawk.

This is how it works, as I understand it. The positive and negative cables provide power to the timing light for the light itself. The inductive clamp is the one that times when the light goes on.
Whenever a current passes through the spark plug wire to fire the plug, the inductive clamp picks up that current in the wire and triggers the timing light to turn on. So seeing the light going on and off is somewhat equivalent to being able to "see" when the plug itself fires.
So how do we use this thing that looks like Han Solo's lazer blaster to check the ignition timing? Well, let's talk about theory or a minute, shall we?
The petrol (or gas) in the cylinder needs a certain amount of time to properly combust, and this time is more or less constant, as determined by the laws of physics. (Of course it's not that simple in real life, what with compression differences and difference in air flow and all that). When the engine speed is slow, you can ignite this mixture when the piston is almost at Top-Dead-Centre (TDC).
Obviously, when the engine speed increases you can't still be firing the mixture at near TDC, because the mixture needs approximately the same time to burn, whether the engine is turning at 900rpm or at 6,000rpm. You'll have to ignite the mixture earlier, so that the power is generated when the piston is on its downstroke (or power stroke).
Controlling when the spark fires is what's known as ignition timing. In older bikes, this used to be controlled by what's known as mechanical "points", and that system was notoriously unreliable because the points wear out.
The next generation of motorcycles have an ignition timing module, which is a little computer that calculates when to fire the plugs based on simple things like engine RPM.
The really modern machines have an ECM (engine control module) that takes in a lot of inputs from sensors like air temperature (to calculate air density), throttle position, engine speed, presence of engine knock and so on to determine when exactly to fire the plugs so you get maximum power or a cleaner running engine, whichever the ECM was tuned for.
I'm a simple backyard mechanic and can't deal with all that complexity, so I'm thankful for the Nighthawk.
On the Nighthawk, the ignition module is not adjustable. So all you can do is check whether the thing is operating as it should or not.
So on to the check. First you have to remove the timing cover, its just held on by 4 screws. Make sure you put the bike on the mainstand first, because there's oil in there.

My apologies for not taking a close up of those reference marks. It was getting dark and I was kinda rushing through this, not a good idea. But the idea is this. You point the timing light at that arrow, and when the plug fires, the light will shine and you will be able to see if the marks on the spikey circle lines up correctly. It works because of the way our eyes work, something called "persistence of vision" or something like that.
When the bike is idling, the reference mark (the arrow thinggy) is supposed to line up with one of the marks on the spikey wheel. When you rev it up to 3,000rpms, you'll see the mark "rotating" on the wheel as the timing advances to fire the plugs earlier.
Well I didn't really take good pictures for this job and you'll soon see why. But first, I hook up the induction lead to Han Solo's blaster.

This is when things get fun. I start the engine and...

So I quickly grabbed the timing cover and pressed it against the engine and turned the bike off. Decided to call it a day, and admit defeat.
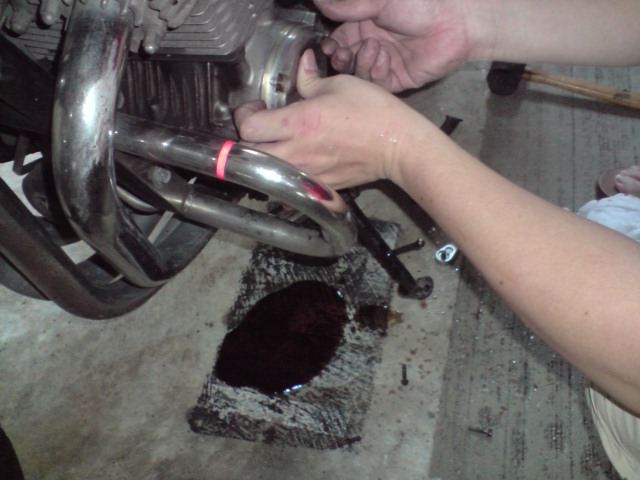
Splattered shorts. It might catch on as a macho fashion statement, who knows.

Well, things didn't go as planned, and that's how these things turn out from time to time. You go back, sleep on it, think about it, and come back and try again another day.
I realized that the design of the timing cover sucks on the Nighthawk, probably because it wasn't designed to have the timing checked. Most other bikes have a small peep window for this, to prevent this from happening.
There are two possible solutions for the Nighthawk if I were to do this again. The first is to get another cover and cut off a small window on the top that will enable me to see the timing marks.
The second was recommended by someone on a forum, and that's to try using clear plastic wrap to wrap the whole thing up when doing the test. I don't know if it'll work or not, the plastic might melt, but it sounds plausible. If you try it, let me know how it works out.
So that's it for this edition folks. Keep at it, and use your tools!
No comments:
Post a Comment